
centos7 Lnux httpd PostgreSQL Porftp firewall PHP7 remi yum
CentOS8時代にCentOS7でwebサーバ
2021-02-05CentOS8の先行きが不透明なので、やっぱりCentOS7をインストールして延命するお話。
さくらのVPSでCentOS7をインストールして設定。今時のイケてる感じではないけど、基本的な構成という感じでご容赦くださいませ。
さくらのVPSのコントロールパネルのログインとか設定とかの操作方法は省略。
注意点としては、今はパケットフィルタが設定できるので、webとかftpは許可しておくといいんじゃないかな。(sshはデフォルトで設定されてるよ)
ISOイメージインストールさくらインターネット:パケットフィルタ
前提条件とか
とにかく必要最低限の設定だけでサーバを立ち上げるられる手順をまとめてみた。これ以外にも、ほんとは細かく設定しなきゃいけないんだけど、要件次第で内容は変わってしまうので、それはそれとしてまた別のタイミングで。
今回は以下を想定。
- 必要なサービスはhttpd / ftpd / PostgreSQL
- メールサーバは外部を使うので設定しない
- サーバのIPアドレスは 111.222.333.444としておく

なにはともあれパッケージをアップデート
インストール直後、SSHでログインして、なにはともあれパッケージのアップデート。400近いパッケージがアップデートされるのでしばらくコンソールを眺める。
$ yum -y update
事前準備
インストール直後は色々使いずらかったりするので、とりあえずざざっと。sshでrootログインをできなくするので、作業ユーザを作成しておく。
locateコマンドを使えるようにするには、サーバ内のファルインデックスをアップデートする必要がある。
ユーザ追加、パスワード設定
# adduser serveradmin
# passwd serveradmin

ファイル検索用(locateコマンドを使えるようにする)
# updatedb

sshの設定を変更する
パッケージのアップデートが終わったら、まずはsshdの設定を変更する。大まかな手順はこんな感じ。
- sshの設定を変更
- firewalldの設定を変更(変更したポートを通す)
- ポートを22→20222(任意)とかに変更
- rootで直接ログインできないようにする
22のままだと、大量にアタックされるからだ。
VPS標準のパケットフィルタではアクセス元など細かく設定することができないのだ。
ポートを変更する / rootで直接ログインできないようにする
設定失敗するとsshでログインできなくなるので、そんな時は慌てずにコントロールパネルのコンソールから修正しよう。
# vi /etc/ssh/sshd_config

17行目あたり
#Port 22
↓
Port 20222

38行目あたり
#PermitRootLogin yes
↓
PermitRootLogin no

sshdを再起動する
# systemctl restart sshd
VPSのパケットフィルタを追加
変更したポートに外部からアクセスできるようにコントロールパネルからルールを追加する。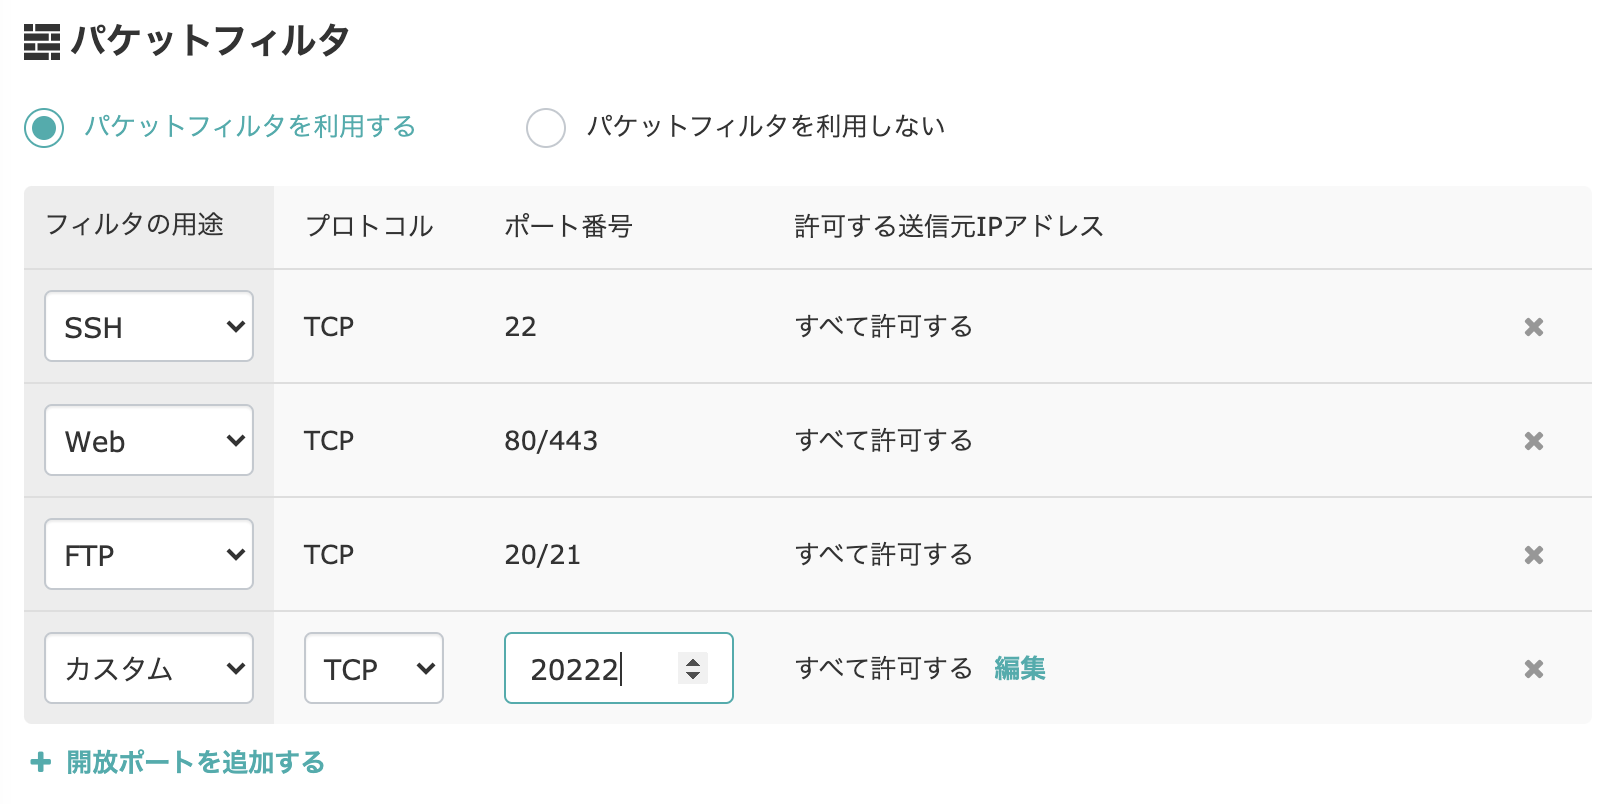
firewalldの設定を変更
変更したポートでsshから接続できるように設定する。firewalldは起動しているか?確認し、起動していなければ立ち上げる。
# systemctl status firewalld
● firewalld.service - firewalld - dynamic firewall daemon
   Loaded: loaded (/usr/lib/systemd/system/firewalld.service; disabled; vendor preset: enabled)
   Active: inactive (dead)
     Docs: man:firewalld(1)

起動していなければ起動する
# systemctl enable --now firewalld
デフォルトの設定ファイル(ssh.xml)をコピーして編集する。
設定ファイルを探してコピーする
# locate ssh.xml
/usr/lib/firewalld/services/ssh.xml
# cp -rp /usr/lib/firewalld/services/ssh.xml /etc/firewalld/services/ssh.xml
# vi /etc/firewalld/services/ssh.xml

port="22" という箇所を変更
↓
port="20222"

firewalldの設定を反映させる
# firewall-cmd -–reload
ここまで完了すると、手元の端末から作業ユーザ(rootではない)で新しいポートでアクセスできるはず。
試してみよう。
無事ログインできたらrootでログインできない事も確認しておこう。
パスワード入力のメッセージが出て、正しいパスワードを入力しても3回失敗してPermission deniedと表示されログインできないはずだ。
作業ユーザでログインしてみる
localuser@M1MBA ~ % ssh 111.222.333.444 -l serveradmin -p 20222
serveradmin@111.222.333.444's password:
Last login: Fri Feb  5 21:43:54 2021 from xxxxx.hogehoge.jp

SAKURA internet [Virtual Private Server SERVICE]

[serveradmin@server-name ~]$ exit
ログアウト
Connection to 111.222.333.444 closed.

rootでログインを試みてみる
localuser@M1MBA ~ % ssh 111.222.333.444 -l root -p 20222
root@111.222.333.444's password:
Permission denied, please try again.
root@111.222.333.444's password:
Permission denied, please try again.
root@111.222.333.444's password:
root@111.222.333.444: Permission denied (publickey,password).
webサーバを設定する
apacheをインストールして設定する。開発言語などは別途インストールするので、ここではhttpdのみを設定する。
インストール
# yum -y install httpd

起動
# systemctl enable --now httpd

確認
# httpd -v
Server version: Apache/2.4.6 (CentOS)
Server built:   Nov 16 2020 16:18:20
firewalldに80/443を通す
httpdのインストールと起動は、おそらく何事もなくするっと終わるはずだ。しかし、このままの状態で手元のブラウザからアクセスするとエラーする。
これはfirewalldを設定する必要があるからだ。
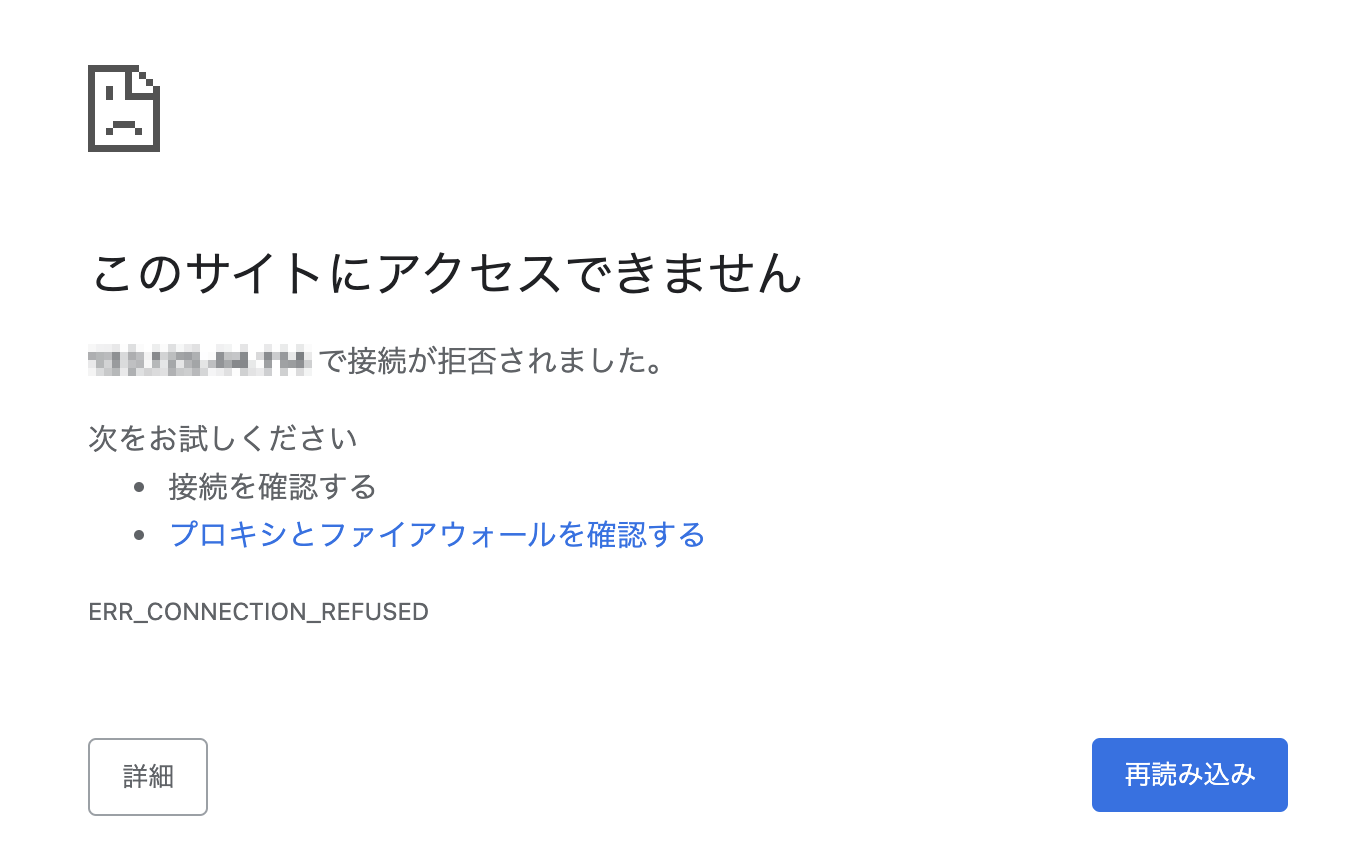
確認、設定
まずは、現在のfirewallの設定を確認する。おそらく以下のような表示がされるはずだ。
これは「publicが有効だよ!」と言っている。 このpublicに対してhttpdの設定を追加する。
確認
# firewall-cmd --get-active
public
  interfaces: eth0

設定を追加する
# firewall-cmd --permanent --add-service=http
# firewall-cmd --permanent --add-service=https

firewalldの設定を反映させる
# firewall-cmd --reload
もちろん、パケットフィルタは設定されているよね?
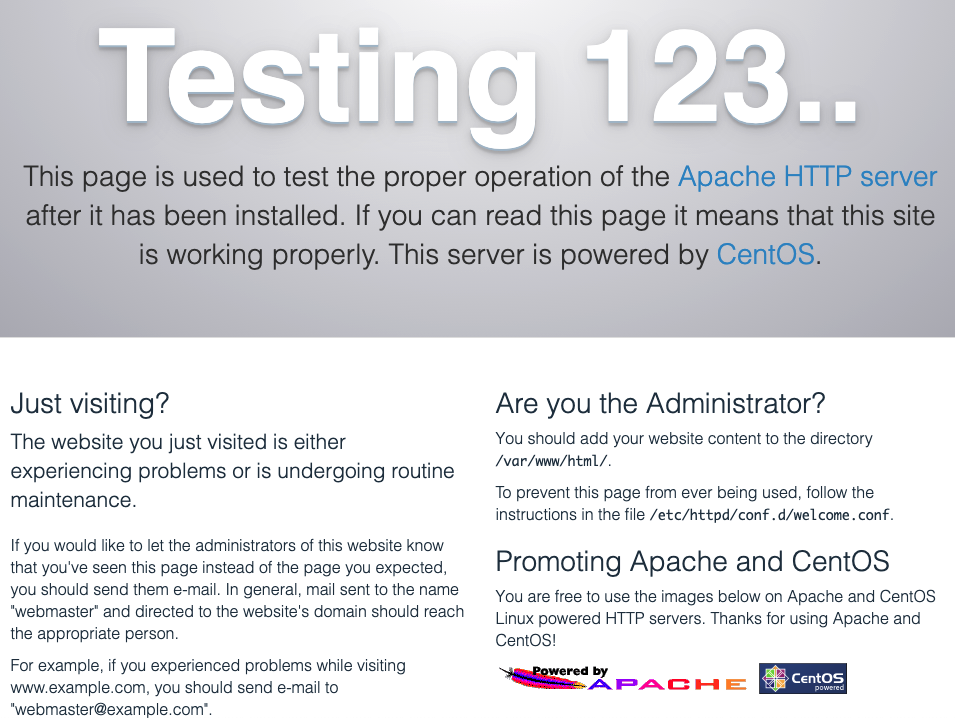
PHPをインストール
必要なライブラリやパッケージは、自分の環境に合わせて読み替えてくださいませ。インストールしてみる
# yum -y install php php-devel php-pdo php-pgsql php-zip php-mbstring mod_ssl php-pear
確認する
# php -v
PHP 5.4.16 (cli) (built: Apr 1 2020 04:07:17)
Copyright (c) 1997-2013 The PHP Group
Zend Engine v2.4.0, Copyright (c) 1998-2013 Zend Technologies
with Zend OPcache v7.0.5, Copyright (c) 1999-2015, by Zend Technologies
イケてない。。。このご時世、5.x系はないだろう。
と言うことで7.4系をインストールする。
インストールしたPHPを削除
# yum -y remove php*

remiのリポジトリをインストールする
# yum -y install http://rpms.famillecollet.com/enterprise/remi-release-7.rpm

インストール
# yum -y install --enablerepo=remi,remi-php74 php php-devel php-mbstring php-xml php-xmlrpc php-gd php-pdo php-pecl-mcrypt php-pgsql mod_ssl php-pecl-apcu php-opcache php-pear

確認
# php -v
PHP 7.4.15 (cli) (built: Feb  2 2021 14:19:57) ( NTS )
Copyright (c) The PHP Group
Zend Engine v3.4.0, Copyright (c) Zend Technologies
    with Zend OPcache v7.4.15, Copyright (c), by Zend Technologies
php.iniのここだけはとりあえず変更しておく。
# vi /etc/php.ini

923行目あたり
;date.timezone =
↓
date.timezone = "Asia/Tokyo"
アップデートする際に読み込むremiレポジトリを有効にしておく。
# vi /etc/yum.repos.d/remi-php74.repo

9行目あたり
enabled=0
↓
enabled=1

アップデートを確認してみる
# yum update php
Loaded plugins: fastestmirror, langpacks
Loading mirror speeds from cached hostfile
 * base: ftp.tsukuba.wide.ad.jp
 * epel: ftp.iij.ad.jp
 * extras: ftp.tsukuba.wide.ad.jp
 * remi-php74: ftp.riken.jp
 * remi-safe: ftp.riken.jp
 * updates: ftp.tsukuba.wide.ad.jp
remi-php74                               | 3.0 kB  00:00:00
No packages marked for update
PostgreSQLを設定する
僕はDBサーバにPostgreSQLを使ってるよ。細かい設定はまた別の機会に。サクッとインストール〜起動まで。
インストール
# yum -y install postgresql-server

初期化するためにpostgresユーザになる
# su postgres

初期化
# initdb --encoding=UTF-8 --locale=ja_JP.UTF-8 -D /var/lib/pgsql/data/

起動する
# systemctl enable --now postgresql

確認
# postgres -V
postgres (PostgreSQL) 9.2.24
ftpを設定する
僕はProftpを好んで使ってるよ。細かい設定はまた別の機会に。サクッとインストール〜起動まで。
インストール
# yum -y install proftpd

起動
# systemctl enable --now proftpd

確認
# proftpd -v
ProFTPD Version 1.3.5e
firewallを設定する
ftpもfirewallを通す必要があるので設定する。もちろん、パケットフィルタは設定されているよね?
これで手元のftpソフトからアクセスできるはずだ。
追加
# firewall-cmd --permanent --add-port=21/tcp
# firewall-cmd --permanent --add-service=ftp

設定反映する
# systemctl restart firewalld
CentOS 7 firewalld よく使うコマンド

イラスト:Loose Drawing
イラスト:Loose Drawing
Heading
Donec sed odio dui. Cras justo odio, dapibus ac facilisis in, egestas eget quam. Vestibulum id ligula porta felis euismod semper. Fusce dapibus, tellus ac cursus commodo, tortor mauris condimentum nibh, ut fermentum massa justo sit amet risus.